Effortless Evolution D5 Golf Cart Emblem Replacement STL: Upgrade Your Ride Today!
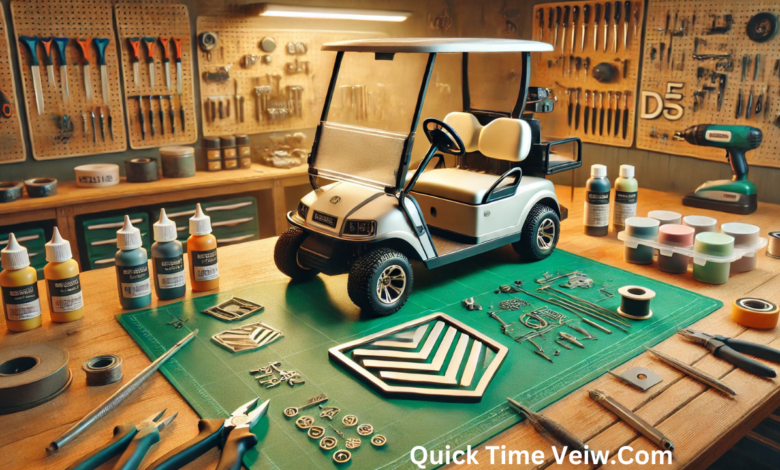
Golf carts have evolved significantly over the years, and the Evolution D5 stands out as one of the most stylish and high-performing models on the market. Many owners look for ways to personalize their carts, and one simple yet impactful modification is replacing the emblem. Whether your emblem is damaged, faded, or you just want a unique custom look, using an STL file for 3D printing provides a modern solution. In this guide, we will explore everything you need to know about “Evolution D5 Golf Cart Emblem Replacement STL“, including how to design, print, and install a custom emblem.
Why Replace Your Evolution D5 Golf Cart Emblem?
Over time, the emblem on your Evolution D5 golf cart may experience wear and tear due to exposure to the elements. Here are a few reasons why replacing it can be beneficial:
- Aesthetic Upgrade: A custom emblem enhances the look of your golf cart, making it stand out.
- Brand Personalization: If you own a fleet or use your cart for promotional purposes, a custom emblem can represent your brand.
- Restoration: Replacing a damaged or missing emblem helps restore the original appeal of your Evolution D5.
- Customization: With 3D printing, you can create an emblem that matches your style.
Understanding STL Files for 3D Printing
What is an STL File?
An STL (Stereolithography) file is a standard format used in 3D printing. It contains the geometric data needed to create a three-dimensional object. STL files break down a design into triangular mesh surfaces, allowing a 3D printer to replicate the model accurately.
Why Use an STL File for Your Evolution D5 Golf Cart Emblem Replacement?
- Precision: Ensures detailed and accurate replication.
- Easy Customization: Modify or enhance the design as per your preference.
- Compatibility: Most 3D printers and modeling software support STL files.
How to Create a Custom Evolution D5 Golf Cart Emblem STL File
Measure the Emblem Space
Before designing your emblem, take precise measurements of the area where the new emblem will be placed. This ensures a proper fit and seamless integration.
Design the Emblem
Use 3D modeling software like:
- Tinkercad (Beginner-friendly)
- Blender (Free and feature-rich)
- Fusion 360 (Professional-grade precision)
Start by sketching your design on paper, then replicate it digitally. Add details such as text, logos, or patterns.
Convert and Export as STL
Once your design is finalized, export it as an STL file. This file will be used by 3D printers to produce your custom emblem.
3D Printing Your Evolution D5 Golf Cart Emblem Replacement STL
Choosing the Right Material
Selecting the right material is crucial for durability and aesthetics. Common options include:
- PLA (Polylactic Acid): Easy to print but less durable for outdoor use.
- ABS (Acrylonitrile Butadiene Styrene): Strong and durable but requires higher printing temperatures.
- PETG (Polyethylene Terephthalate Glycol): UV-resistant and weatherproof, ideal for golf carts.
Preparing for Printing
Load your STL file into slicing software like Cura or PrusaSlicer. Adjust print settings for:
- Layer height: 0.1-0.2mm for fine details.
- Infill: 20-50% for a balance of strength and material efficiency.
- Supports: Enable if your design has overhangs.
Start the print and monitor for quality assurance.
Post-Processing and Painting
Removing Supports and Smoothing the Surface
After printing, carefully remove any supports. Use sandpaper or a fine file to smooth rough edges.
Painting Your Emblem
- Priming: Apply a primer for better paint adhesion.
- Painting: Use spray paint or acrylics for a custom finish.
- Sealing: Apply a UV-resistant clear coat to protect from sun damage.
Installing the New Emblem
Removing the Old Emblem
Use a heat gun or hairdryer to soften adhesive and gently peel off the existing emblem. Clean the surface with rubbing alcohol to remove residue.
Attaching the New Emblem
- Double-sided tape: Easy to use and remove.
- Automotive adhesive: Stronger bond but more permanent.
- Screws: For added security, drill small holes and attach with screws.
Press firmly to ensure proper adhesion and alignment.
Maintaining Your Custom Emblem
To keep your emblem looking new:
- Clean regularly: Use mild soap and a microfiber cloth.
- Protect from sun: Store your cart in a shaded area or use UV-resistant coatings.
- Inspect periodically: Ensure adhesive is holding up, especially after exposure to extreme weather.
FAQs
1. What is the best material for a 3D-printed Evolution D5 Golf Cart Emblem Replacement STL? PETG is the best option due to its durability, weather resistance, and UV protection. ABS is another strong choice, but it requires higher temperatures for printing.
2. Can I customize my Evolution D5 Golf Cart emblem design? Yes! Using 3D modeling software, you can add text, logos, or unique shapes to create a fully customized emblem.
3. How do I attach the new emblem to my golf cart? You can use automotive adhesive, double-sided tape, or screws for a secure installation, depending on your preference.
4. Where can I find STL files for Evolution D5 Golf Cart Emblem Replacement? You can design your own using software like Blender or Tinkercad, or check online 3D model repositories for existing designs.
5. How long does it take to 3D print an emblem? Printing time depends on size and detail but generally ranges from 2 to 6 hours.
Conclusion
Customizing your Evolution D5 golf cart emblem is an excellent way to enhance its appearance and make it uniquely yours. With the help of 3D printing technology and STL files, you can create a durable, stylish, and personalized emblem that lasts. Whether you’re restoring an old emblem or creating a brand-new design, this process allows you to tailor your golf cart to your exact preferences.
Read More: Scott Levin Car Crash 2011: A Story of Resilience, Community Support, and Recovery